
Passport sleeve
- Annette Nordell
- Jan 9, 2025
- 2 min read

Updated: Jan 23, 2025

The passport sleeve came about when it was time for my daughter to renew her passport. When she was born she was gifted a passport sleeve (with matching luggage tag) that said “my first passport”.
I have been traveling with her since she was a baby so I’ve always been using her passport sleeve, even though it is meant for saving the very first passport.
Last year is was time to get a new passport for her so I took her first passport and the sleeve and put them away. But my daughter had grown attached to her passport sleeve so she wanted another one.
Looking at it, I figured “I can probably make one of those out of fabric instead”. The original is made out of faux leather I think.
I took measurements and made a sketch.
First I made simple, no lining, straight pockets, using scraps to see if my sewing math checked out. It did.

On to the curved pockets! And a magnetic snap closure! I however don’t like a closure on mine but it can definitely be done.

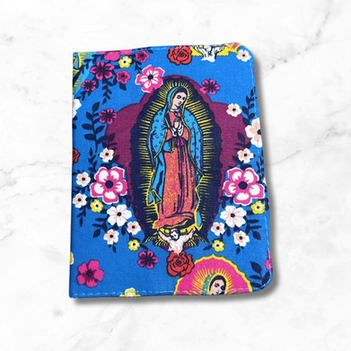
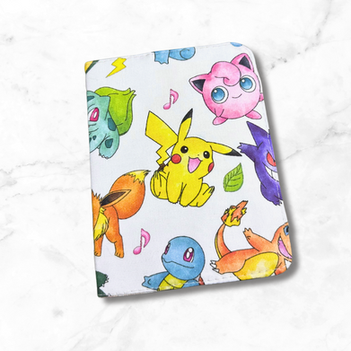
I tried a few different fabrics including faux leather/suede and cotton canvas. I am quite fond of the our lady of guadalupe sleeve with the faux suede lining, but the pokémon sleeve is the one my daughter will be using.


I’ve tried different thickness of stabilizer, 1 and 2 layers of decovil light and decovil heavy.
The heavy decovil it pretty hard to turn out through the 3 ¾” opening and it always comes off in places in the process. But it can be done.
What you use depends how stiff you want your sleeve. The passport itself adds a bit of stiffness too.
I personally prefer the decovil light. But I also use a slightly thicker woven interfacing (Wovenfix2) so that adds extra stability I feel.
Next, since I own a Cricut Maker 3, I decided to use HTV to make a sleeve that looked sort of like the original passport sleeve. For the first one I used glitter HTV but forgot to weed the letters. Fail.


Also the glitter made the design hard to read.
Next, pink HTV. Cricuts own brand again and it failed miserably. I’ve used it on other projects before and it never gives good results. I think it’s best to throw this vinyl away. Fail.
So for the third one I used a different brand (Lya Vinyl) and it turned out great.
I have the project available for you if you want to try it. I’ve used only free fonts and images so you don’t need Cricut access. Here is the link.


The pattern is free to download in my shop. Please tag me on instagram if you make one. I'd love to see what you made.


Comments